
Hello,
This tutorial going to be 2 parts tutorial, in this post we will cover installation and upload system and next article will cover editing and deleting system.
In this tutorial we will learn How to make multiple image upload with DropzoneJs in laravel
Important For this tutorial we will do 2 step data saves, Step one: save your post,product data. Step two: save images to that post,product.
For this matter we will need simple change to our post,product controller, and that's to redirect users(admins) to show page after saving data instead of index page.
Explanation:
We will need our post,product id in order to set that id to our multiple images and make a relationship between the two. For that matter we will redirect users to show
page which is getting id
of our product by default Laravel rest api
All you have to do is to set this line after your post,product saved in store
method of your controller.
return redirect()->route('products.show',$product->id);
Let's start
- Download dropzonejs and add to your application
- Include dropzonejs in any page that you like to have your upload box
- Create function including data below in any controller you like
public function dropzone($id) { $product = Product::find($id); return view('dropzone-view', compact('product')); } public function dropzoneStore(Request $request) { $productID = $request->imageable_id; $product = Product::findOrFail($productID); //check if file was uploaded if ($request->hasFile('file')) { $file = $request->file('file'); $filename = 'product' . '-' . str_random(10) . '.' . $file->getClientOriginalExtension(); $filePath = public_path('images/'); $request->file('file')->move($filePath, $filename); return Image::create([ 'name' => $filename, 'imageable_id' => $productID, ]); } Session::flash('success', 'your product added successfully'); return redirect()->route('products.index'); }
PHP
- Add this route to your web.php file
Route::post('dropzoneStore', 'ImageController@dropzoneStore')->name('dropzone.store');
PHP- Remember change names to set with your controller
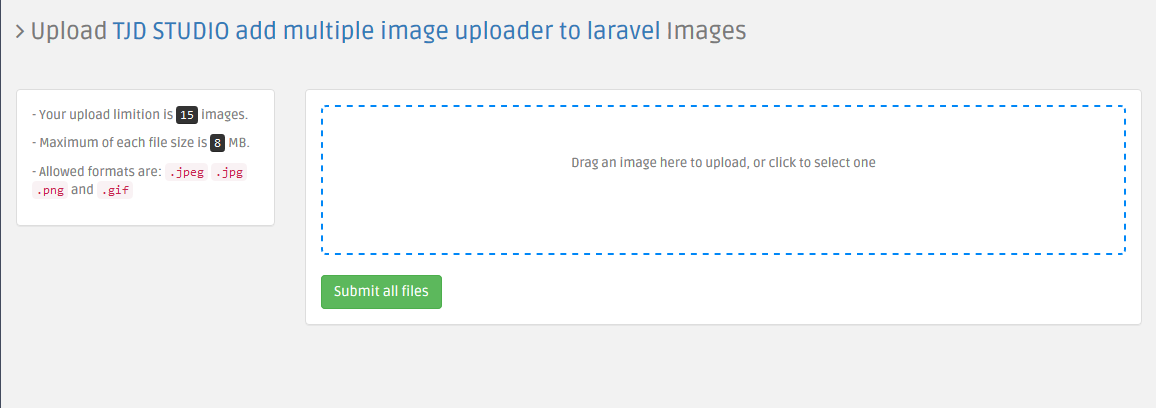
- Add form below to your view
{{ Form::open(array('route' => 'dropzone.store', 'method' => 'post', 'files' => true, 'class' => 'dropzone', 'id' => 'my-awesome-dropzone')) }} < input name = " file " type = " file " multiple / > < input name = " imageable_id " type = " hidden " value= " {{$product->id}} " / > {{ Form::submit('Create Product', array('class' => 'btn btn-success')) }} {{Form::close()}}
PHP
- Add javascript below to your view
< script typ e= "text/javascript" > Dropzone.autoDiscover = false; var myDropzone = new Dropzone("form#my-awesome-dropzone", { headers: { "X-CSRF-TOKEN": $("meta[name='csrf-token']").attr("content") }, acceptedFiles: ".jpeg,.jpg,.png,.gif", dictDefaultMessage: "Drag an image here to upload, or click to select one", maxFiles: 15, // Maximum Number of Files maxFilesize: 8, // MB addRemoveLinks: true, dictRemoveFile: 'Remove', dictFileTooBig: 'Image is bigger than 8MB', }); myDropzone.on("success", function (response) {console.log(response.xhr.response); }); < / script >
JavaScript
- Create image table with data below
Schema::create('images', function (Blueprint $table) { $table->increments('id'); $table->integer('imageable_id')->nullable(); $table->string('imageable_type')->nullable(); $table->string('name'); $table->timestamps(); });
PHP
- Add codes below to your image.php (model)
protected $fillable = ['name', 'imageable_id']; public function imageable() { return $this->morphTo(); } public function product() { return $this->belongsTo(Product::class); }
PHP
- Add codes below to your product.php (model)
public function images() { return $this->morphMany(Image::class, 'imageable'); }
PHP
Finished. You are ready to go.
Final result:
- Last updated 5 years ago
Be the first to leave a comment.
You must login to leave a comment