


As a developer, there are several ways you can show off your skills to peers and prospective employers. Open source contributions are great. Blogging is great. But at some point you’ll want to get projects up on the web, where people can actually use them.
Too many times have I started something locally and never seen it through. You may have done the same. One reason this is so common is because of all the extra work that goes into deployment.
Wouldn’t it be nice to have a central hub where all of your projects live without worrying about hosting and server configuration? This post will walk you through one popular deployment tools that require a minimum amount of effort. Surge
There are several popular services that allow you to share your front-end work with minimum afford yet they require some settings and customisations, some of them are (Githuib pages, vercel, netlify, etc.). This post we will learn about Surge where all you need is one simple command line surge
Step 1:
Install surge on your system globally
// Windows
npm install --global surge

// macOS, Linux
sudo npm install --global surge
Step 2:
Go to your project folder where index.html is
Step 3:
Open command line in that folder and type following command surge
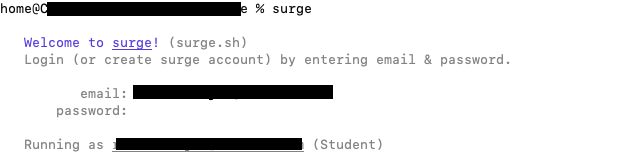
Step 4:
Enter your email address and password
Step 5:
Choose your preferred domain name
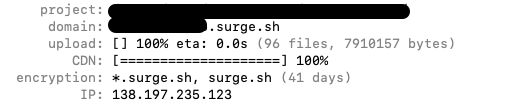
Step 6:
Wait for upload to finish and enjoy your live hosted website.

Easy right?
- Last updated 4 years ago
Ads


Be the first to leave a comment.
You must login to leave a comment