


Hello dear followers,
Today I have exciting tutorial for you, we are going to learn how to use X-editable in Laravel application.
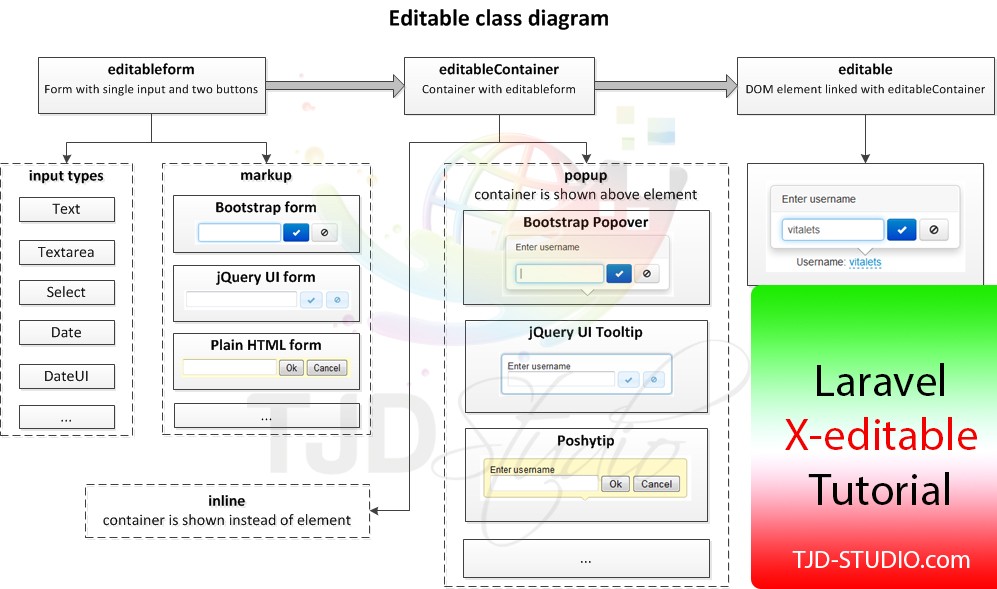
Here is official description about X-editable:
This library allows you to create editable elements on your page. It can be used with any engine (bootstrap, jquery-ui, jquery only) and includes both popup and inline modes.
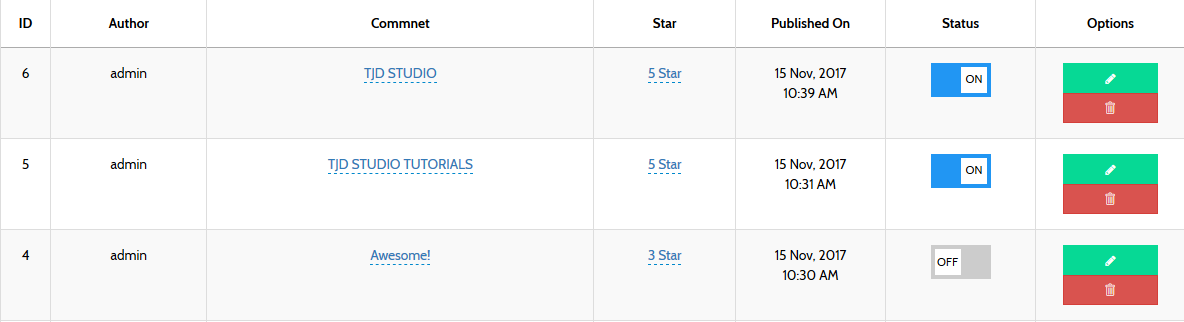
Here is screenshot of result we will achieve:
Video:
OK, now that you know what we want to do let's begin.
1- Go to X-editable website and download files that you like to use (for this tutorial we're going to use Bootstrap 3).
2- Import files to your page.
If using CDN
If using downloaded version
3- Let's make our function
Personally don't like to make many controller for same files so I'm going to use my RatingController and add new function into it. (You can make separate controller if you like there is no limitation)
4- Making Route:
remember we used method POST for our route.
5- Make form in your blade:
As you can see I put my where I show my reviews comment in form where the action gets route of our new function and only that part not whole of my table body, because other part we will use for other function (NOTE: there is no limitation of how many forms that you can use in one page, as long as their action url's are different).
6- JavaScript codes (FUN PART)
This actually took awhile for me to get it done so please try to learn it and share your love in comments
At the top of my code I used Inline mode in order to show my edit areas inside my table if you like to see it as popover you can use popup mode (read X-editable documentations).
Then I setup header token in my Ajax code which will get same token as my form in {{csrf_field()}} .
As you can see in X-editable documentation we will need PK as id and URL methods to send data to, for that reason I created variables rating_id and url to get my reviews id and url from my form data-pk and data-url .
Then we have Jquery with .comment class to get our database rows and id's, Note: in X-editable documents they defined by ID #username and if you use ID in here you will only get the last database entry working and rest of your rows will be only link without ability of edit, so is important to you get your rows by class and not id.
In my Jquery function we have pk: and url: which we are connecting to our variables that we've created before.
We also have type of editor we want in this case we need textarea for editing comments.
Then I added validation that if comment is empty do not save it and show This field is required error.
Now you have everything setup for you, go and test it. (Don't forget to back here and share your opinion on this tutorial).
EXTRA:
Personally hate tutorials that will left users middle of the way and try to get comments by that! so here I try my best to give you most completed tutorial that you can find in the web so far.
Q: what if I need to add another entry of mine to this method and edit it in my index file?
A: As you can see in my video (top of this article I have 3 different entry in my reviews page that I can edit from index file, we've already made one, let's make second one and edit our rates range (stars).
7- Add new function to your controller in order to edit your ratings.
8- Add new Route:
9- Add new form to your table body (where you show rates)
Explanations are the same as I said for comments edit.
10- Add new Jquery to your code:
As you can see our rating code has some differences with our comments codes and that's because we we are going to use select type for our rating instead of text or textarea.
I added source array to my code in order to add our options for choose and I made 5 options where values are 1 to 5 and texts are 1 Star to 5 Star.

Did you know?
You can learn more from our paid video tutorials at Irando Courses.
- Last updated 6 years ago
Ads


Be the first to leave a comment.
You must login to leave a comment